Setting joints
Setting the robot joints is the process of identifying the real value of the joints and assigning them to the robot. There are multiple hard stops available on the robot and can be used to identify the true value of a joint. In the homing process we put the robot on a specific orientation, where the value of the joints are known to us.
How to home the robot. First, turn off the motors and put the robot in, j0 = 180, j1= 180, j2 = 1-42, j3 = 135, j4 = 0 (this orientation has been depicted below). Make sure that all the joints are are touching their associated hard stop. You can put slight force on top and side of the robot (negative Z-direction and negative Y-direction) to make sure that all the joints are touching their hard stops. Once the robot is in this position, set the joints to.
j0 = 180
j1 = 180
j2 = -142
j3 = 135
j4 = 0
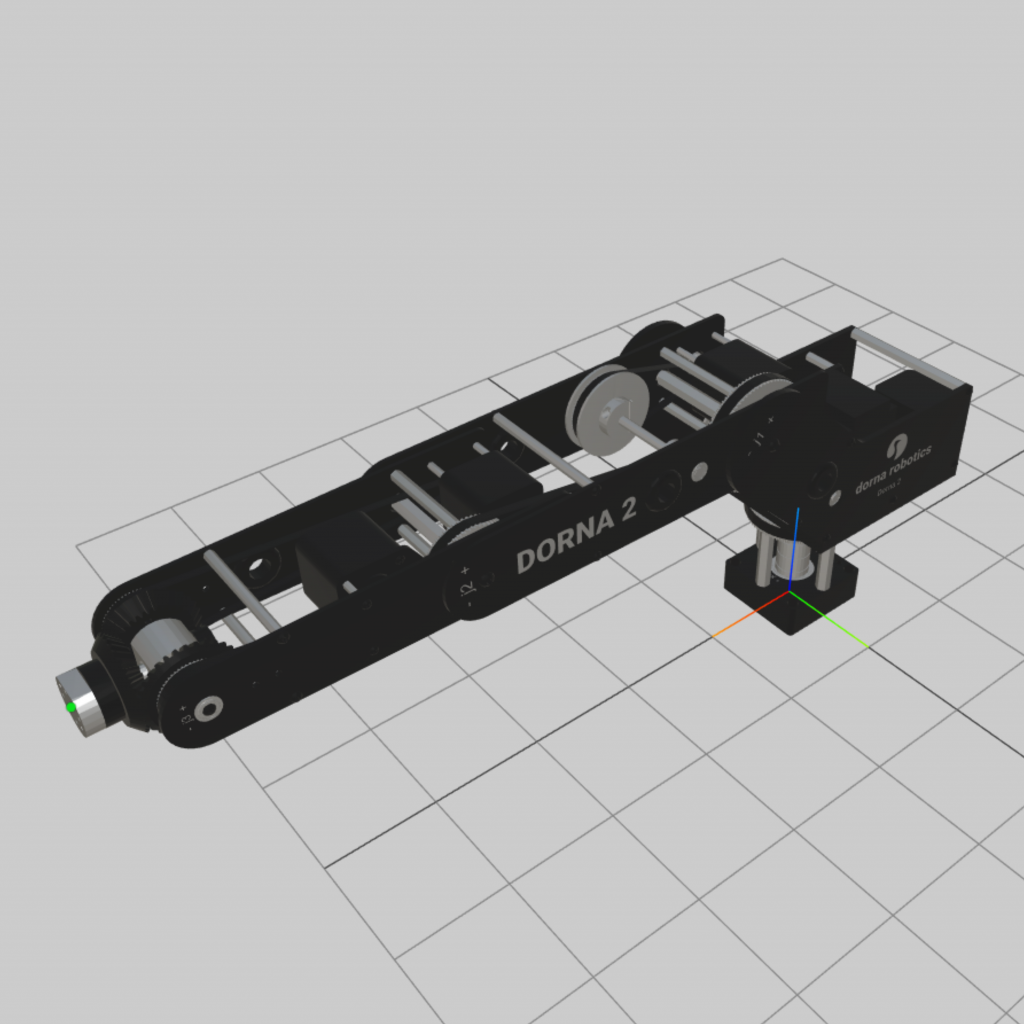
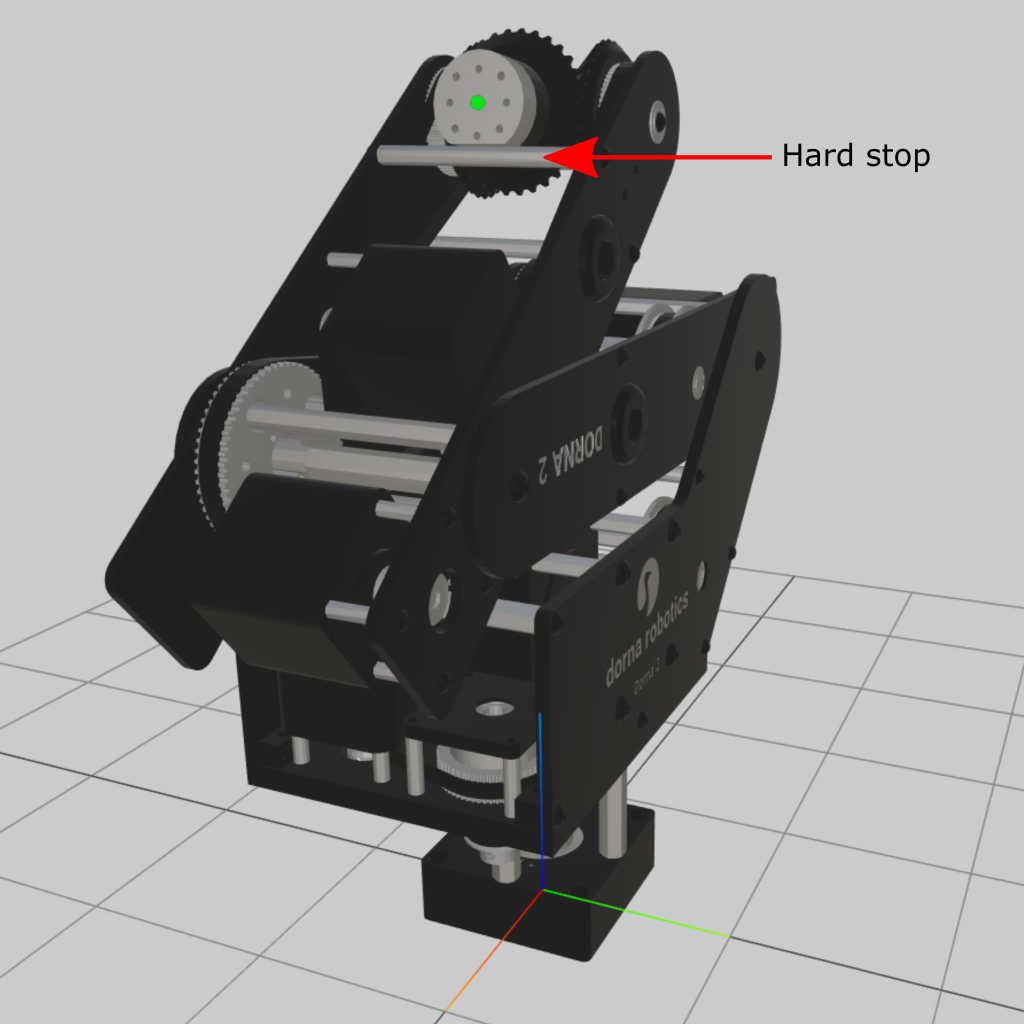 j3 and j4 touching a hard stop
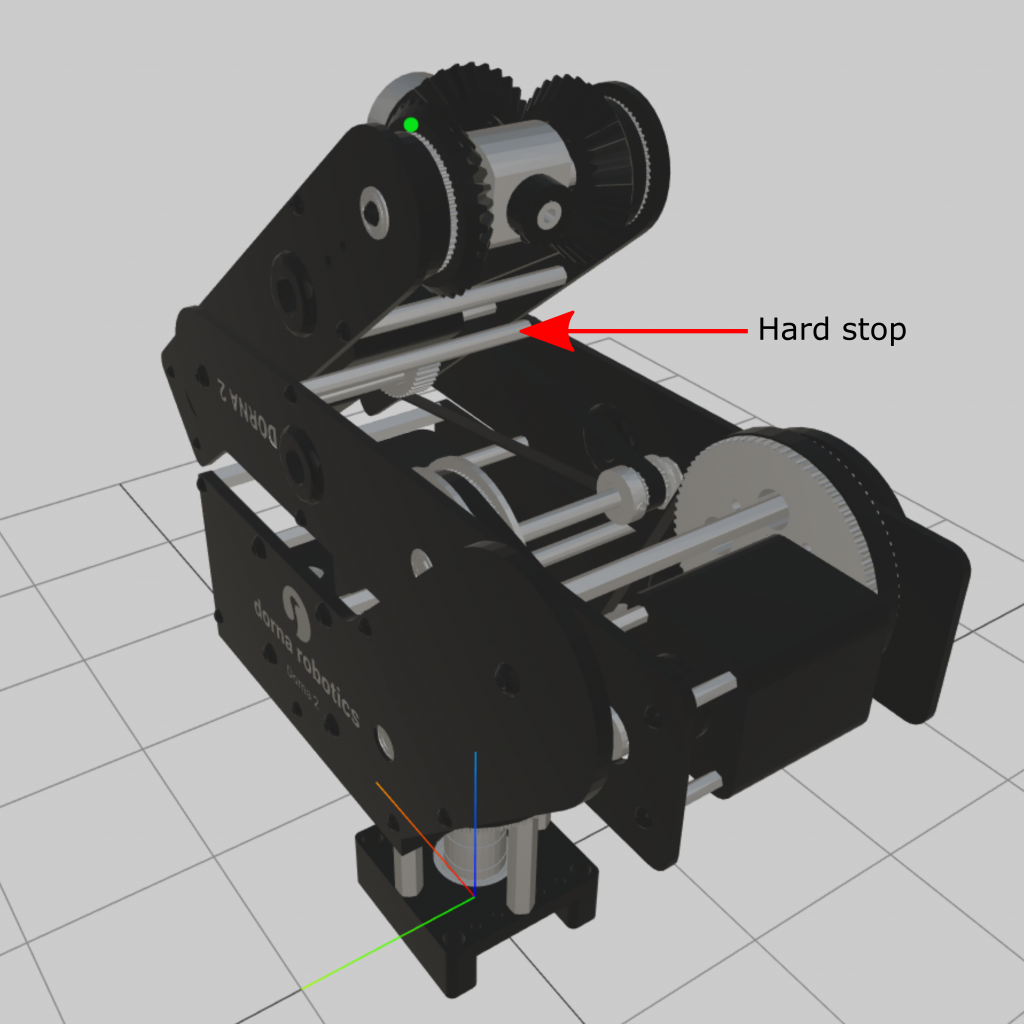 j2 touching a hard stop
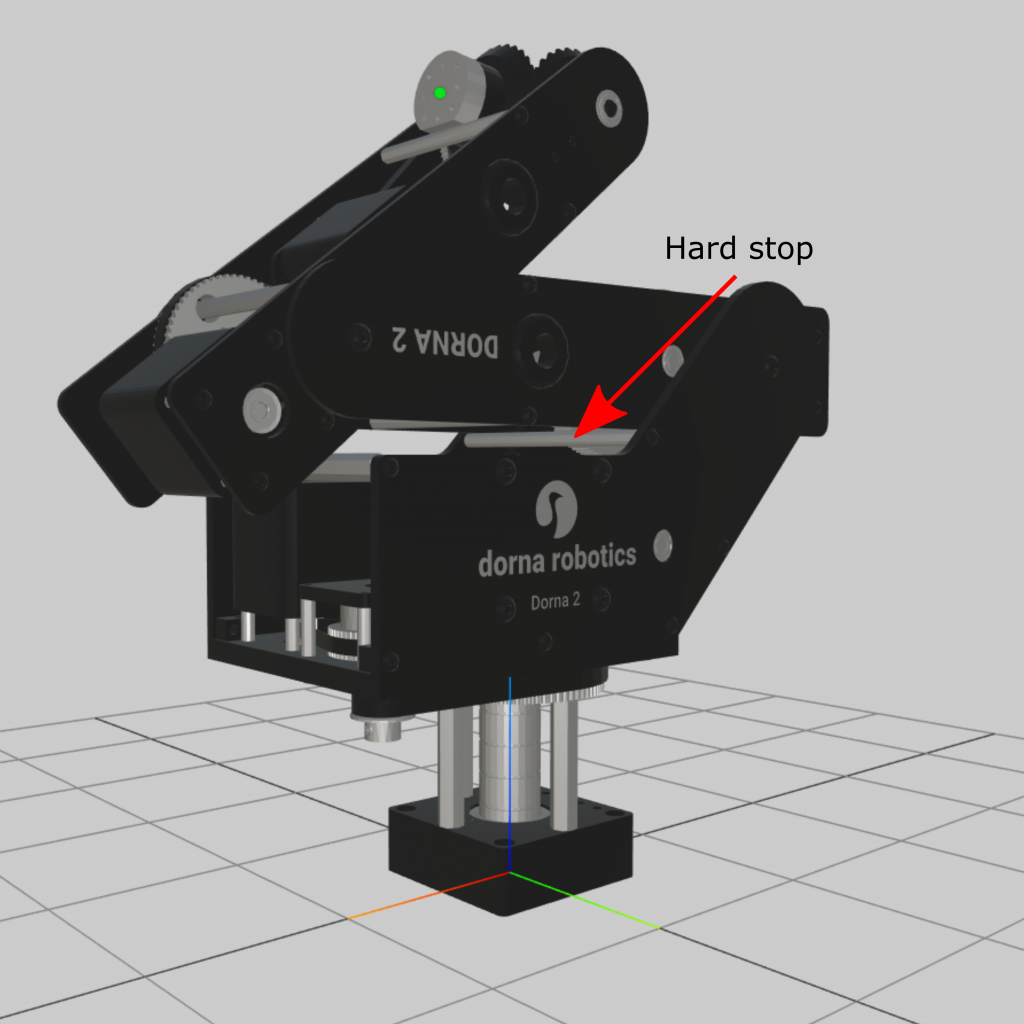 j1 touching a hard stop
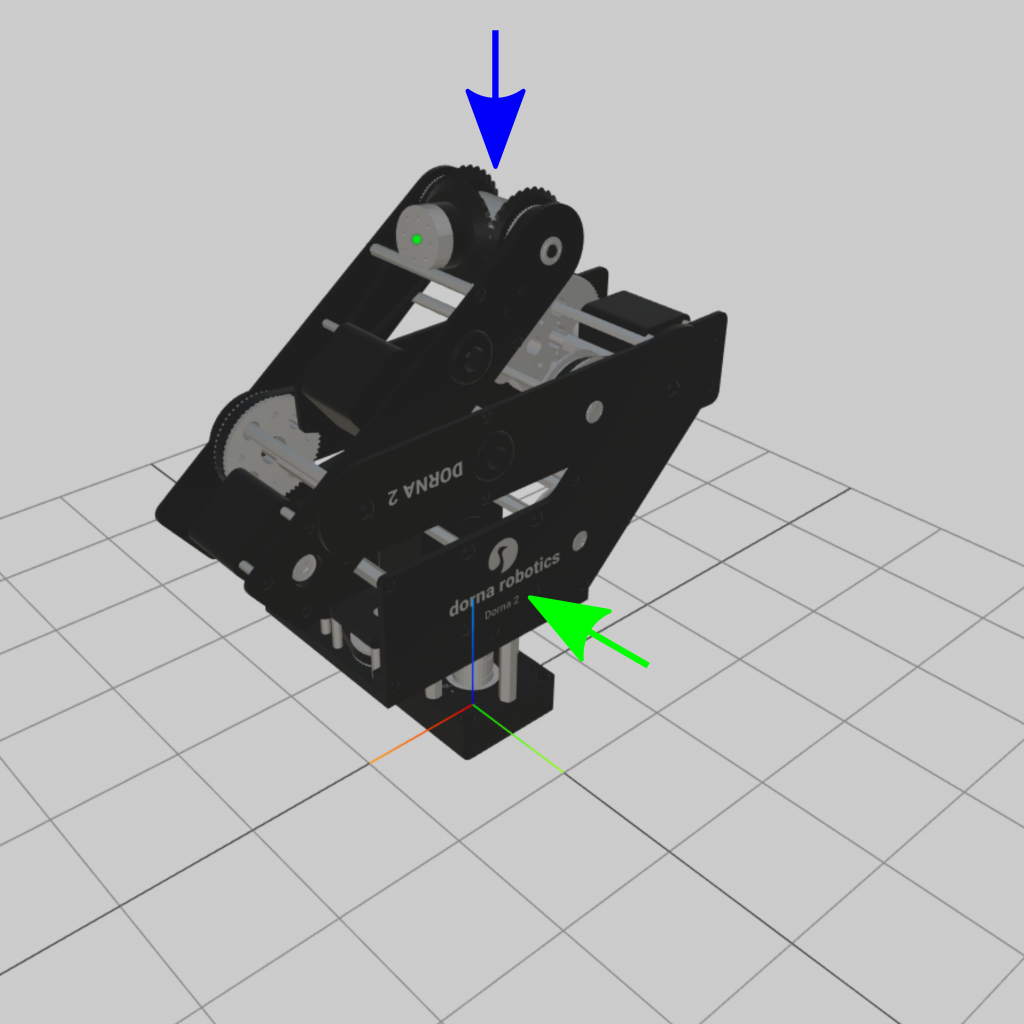 Add slight force in the direction of the arrows and make sure that all the joints are touching their hard stops.
 Orientation of the robot when all the joints are zero
Orientation of the robot in the homing position, and hard stops are depicted from different angels. The orientation of the robot in all zero joints is also depicted for reference.
Notice that, each time the controller box turned on, or the robot encoder cable is conned to the controller box, we need to set the joints. After setting the joints, the robot maintain its position via encoder, even if the motors are disabled.